How I made the entry to the Mythology cgboost contest
If you find this site helpful, consider my Patreon Page.
I made this entry into the Cgboost Mythology Contest.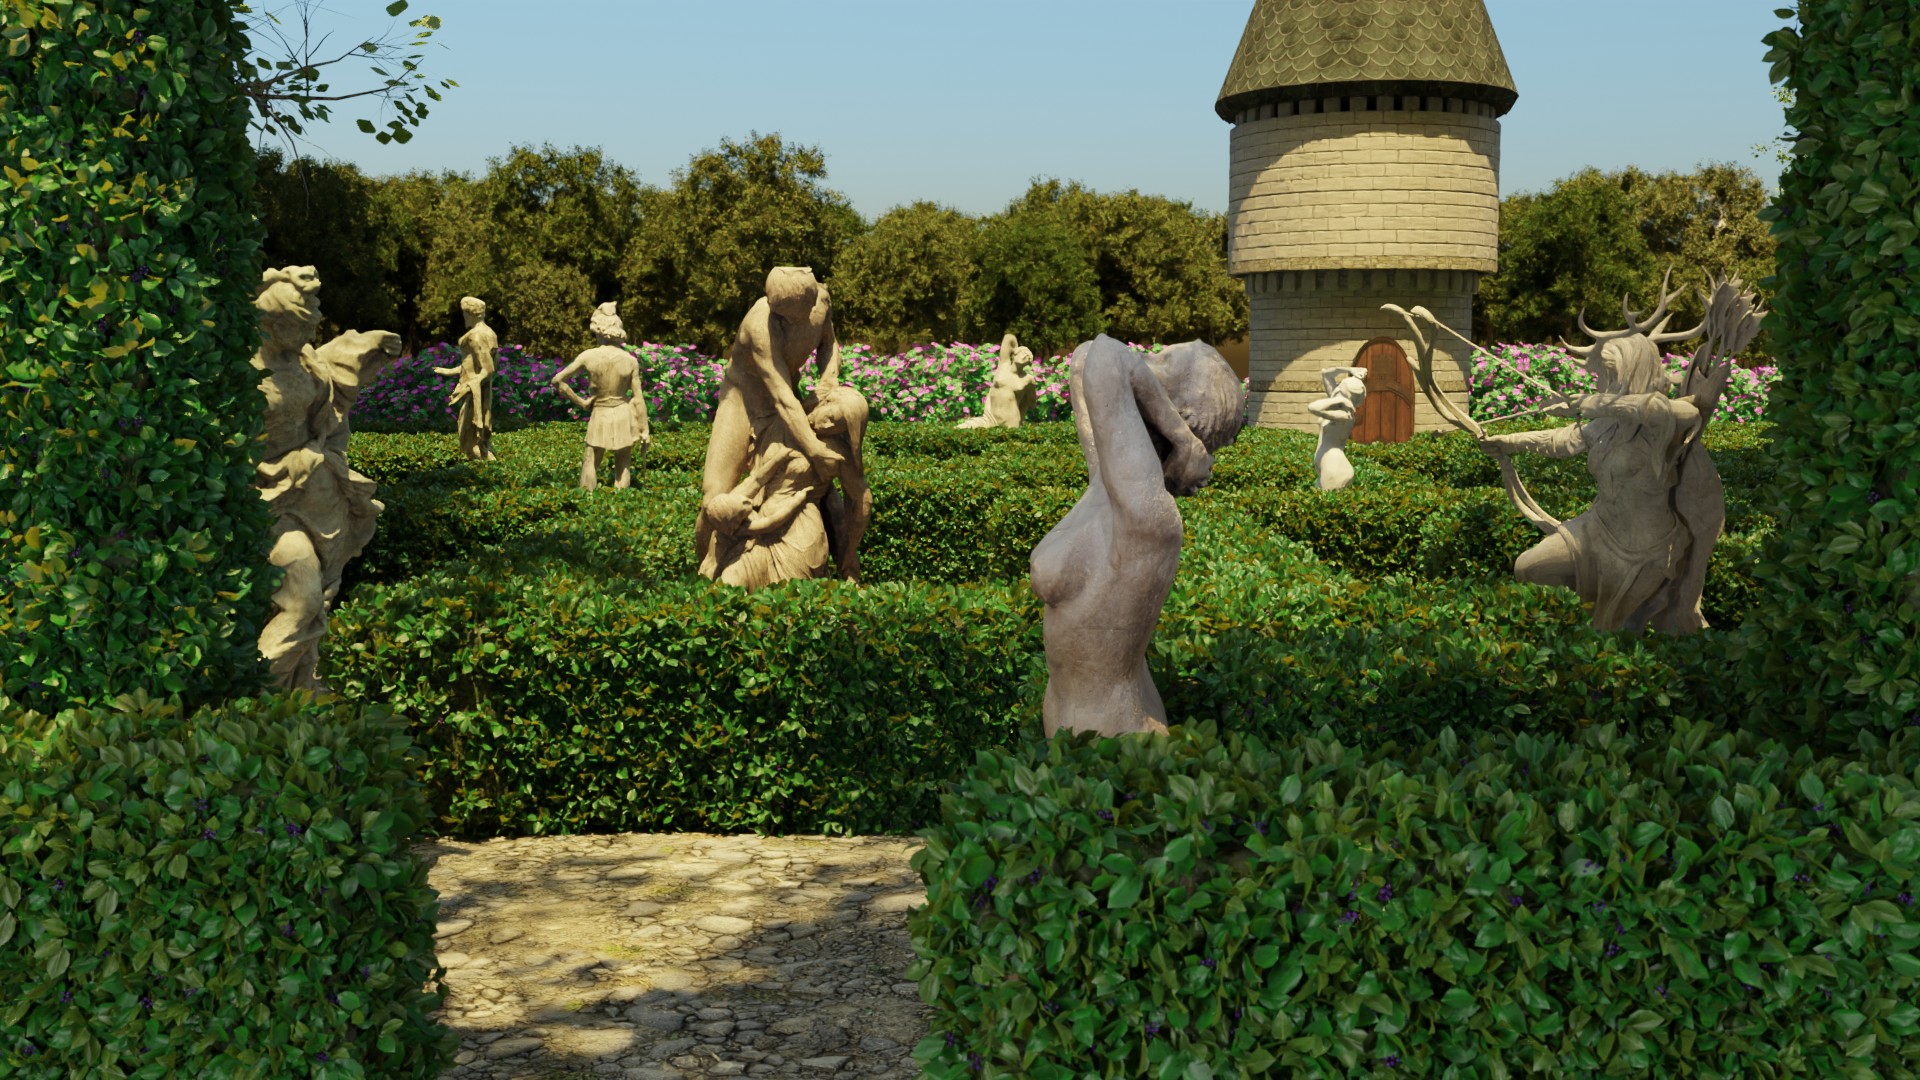
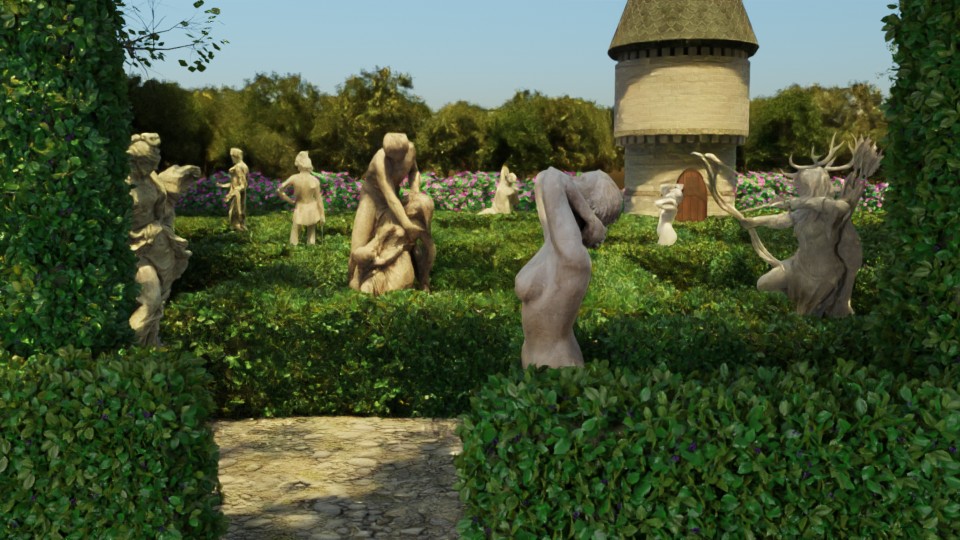
This was the inspiration for this image. I Had the idea to make a Medusa's Garden, (with statues)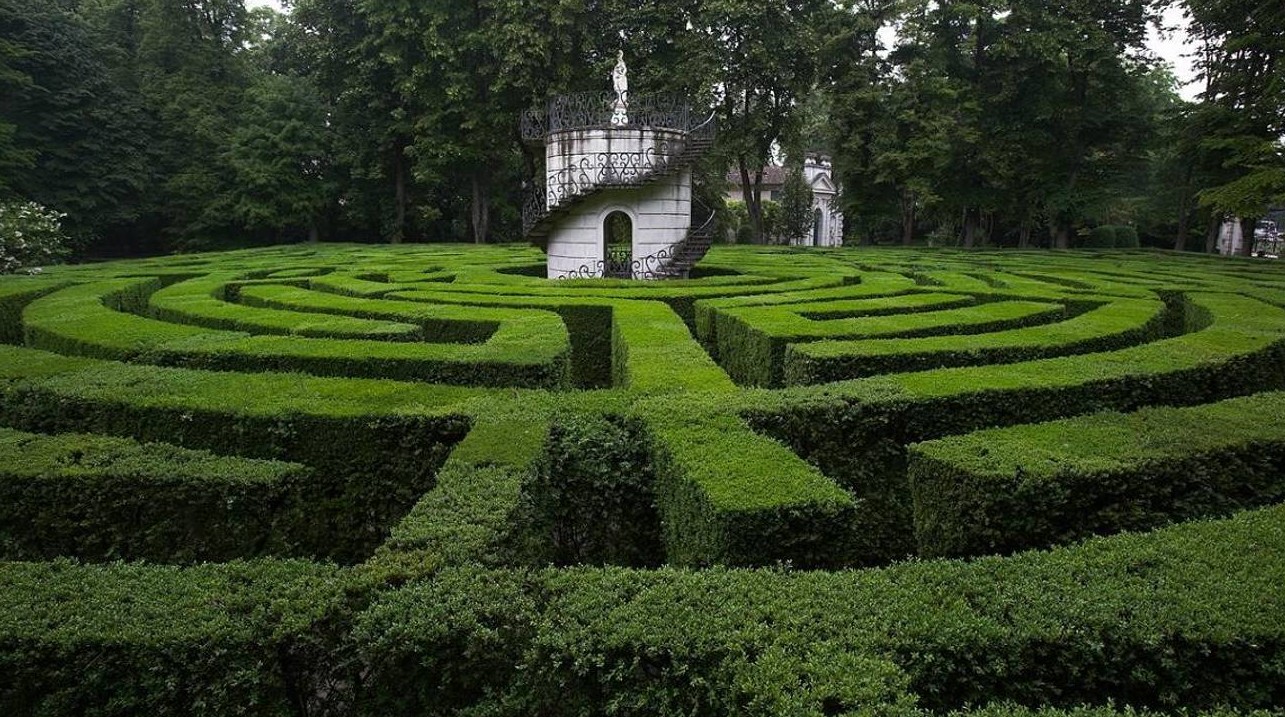
I tried to make a geometry nodes maze. Since that feature just arrived with Blender 3.0 and was very different from the previous Geometry nodes, I struggled with what nodes does what. I found some of the nodes were similar to the shader nodes, like color ramp and image node. I got an image node and was able to make instances of cubes where the maze image was white. The maze image was b/w image.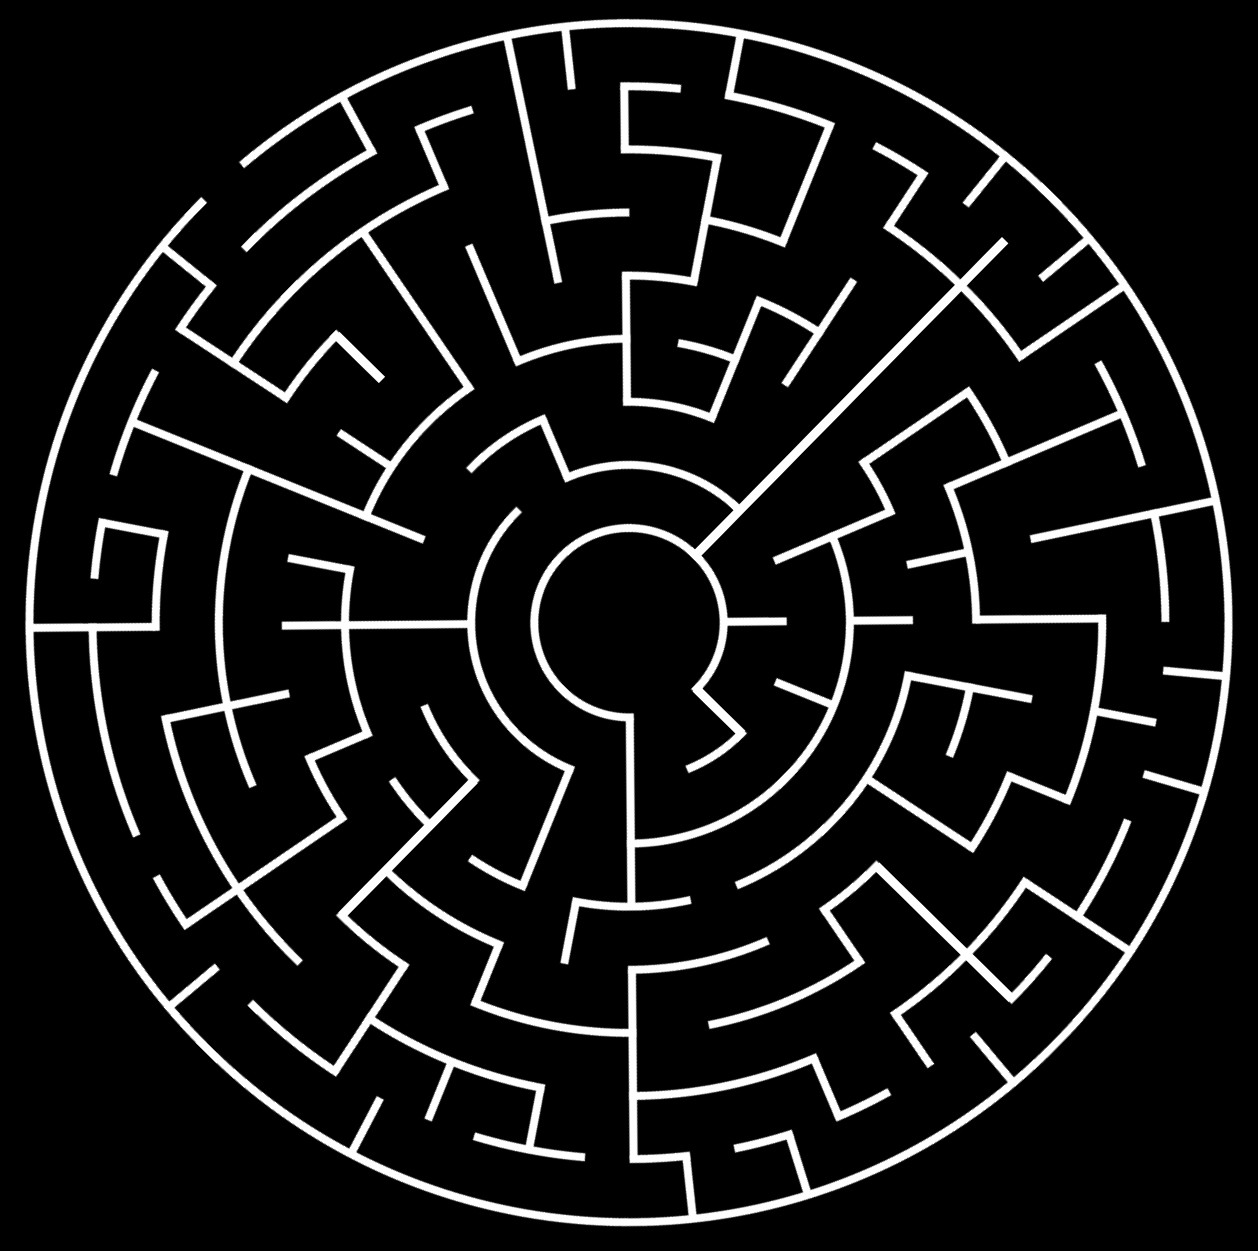
I subdivided a plane and used that as the basis of the geometry node. The detail of the maze was not very good in terms of resolution. With my limited knowledge of this new technology, I wasn't sure if I could use this new Tech yet. Maybe getting an image where the white lines were thicker would help. Without knowledge of how the image node texture places the position of the cubes, was lucky to get the result below.
Here I was able to change the shape of the cubes so they were thicker and taller. The next step would be to replace the cubes with hedge cubes.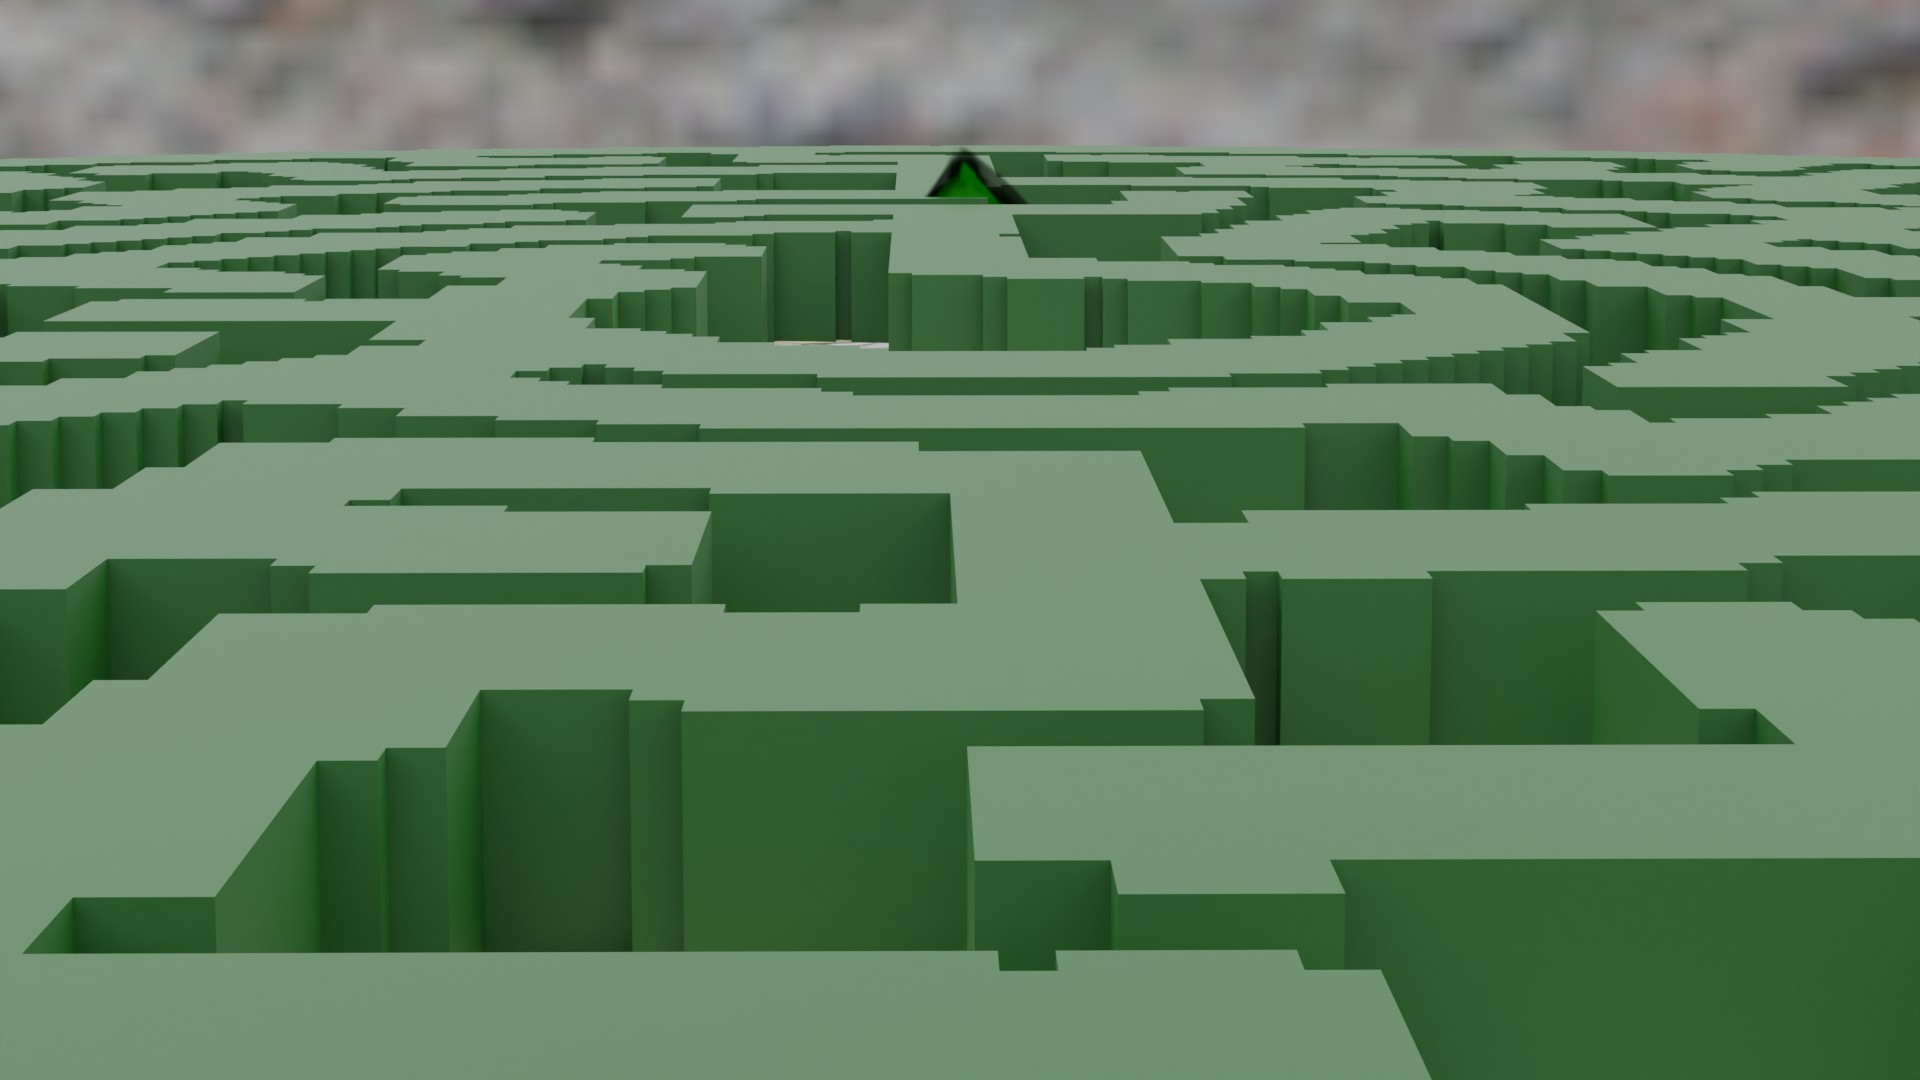
So after getting a cube maze I started on the hedge. I found this tutorial about how to make a wreath.
Here is the first attempt of a hedge with geometry nodes. Only one leaf but looks promising. There is a green cube inside the hedge, so light doesn't pass thorough. I used a set material node with a leaves texture for the inside cube, but geometry nodes just made a green color. (Might be a bug with geometry nodes, or something I did wrong?) Then I noticed that geometry nodes were lagging my computer when I tried to copy and paste this shrub object multiple times. So, I had to go with an object of a hedge I found on blend kit, which was very high resolution. I had been playing with geometry nodes for a week and found them to be super powerful. I will have to keep on experimenting with that with simple objects. When I get a faster more capable computer, geometry nodes will be something I use more often. With only a little more than a day left of the challenge I wasn't sure I could make an image. Geometry nodes was impressive, I was able to change the shape of the hedge to whatever size and shape I wanted with only changing a few nodes and values, like 1m to 2m to make the hedge wider. Instead of using a cylinder node for the pine needles, I used a collection info node and used a leaf with an opacity map. Using more leaves of different shapes and colors would yield a better hedge. I used this tutorial to make the hedge. In the tutorial he uses a noise node to vary the shape of the hedge from a perfect circle to a circle that was irregular in shape. Something to do on my hedge.
A very regular looking hedge. (too regular) Some things to do later would be to make the shape more irregular, with displacements more varied size and shape of the leaves. Add in branches inside the hedge, something I know geometry nodes can do, but have no idea how to do that yet.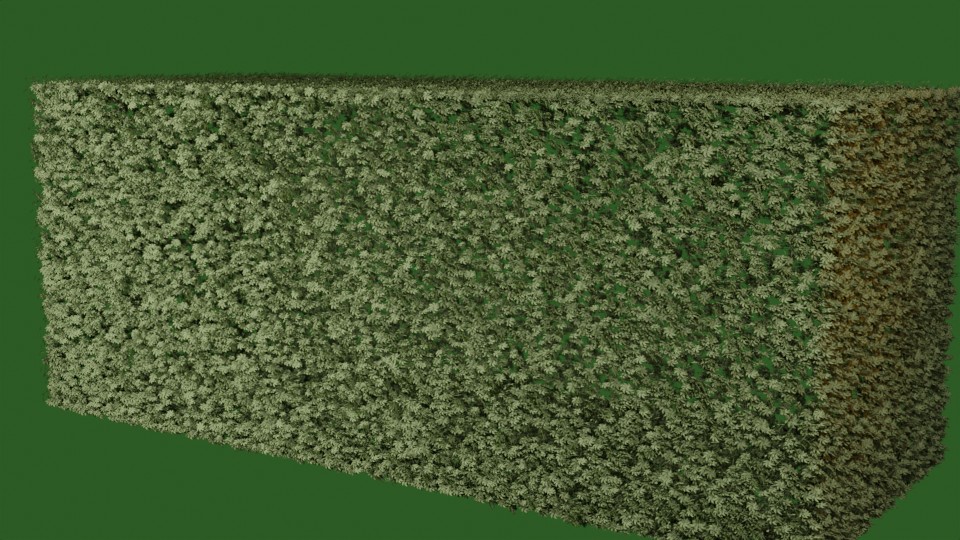
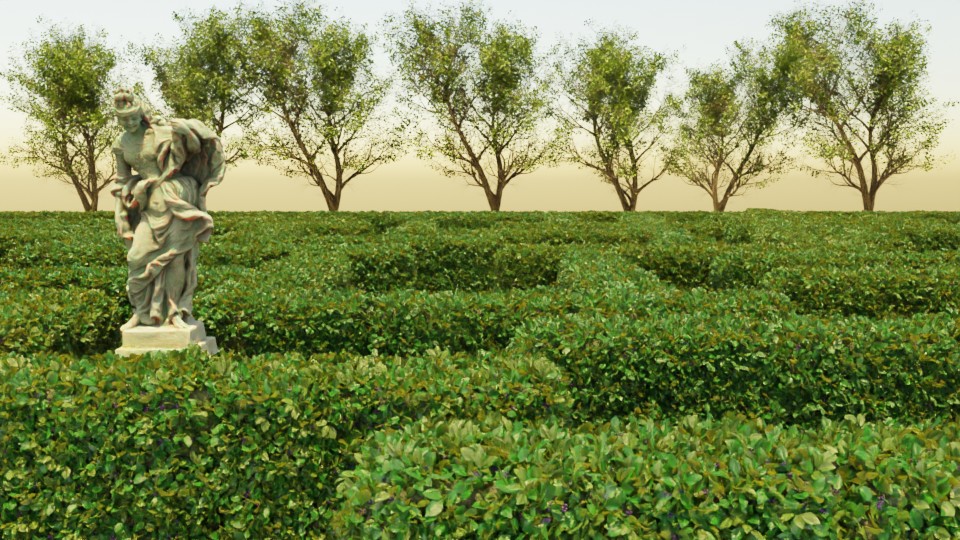
I stopped experimenting with this image-based maze with geometry nodes because I was running out of time if I wanted to submit something for the contest. Although promising, and only YouTube videos of how to use the geometry nodes, and the realization that even If I did get the hedge to look better, my computer wouldn't handle it, the next step, was to place the hedges in a maze structure and adding statues. So, there is a plugin that makes hedges called gardener, that looked very good, but I found a hedge on blend kit. I started with the hedges and some trees, and a statue I found on the web. This hedge object was just in the shape of a rectangular cube, and I turned on the snapping tool. This made aligning the hedges very easy, and I was able to make a maze fairly quickly. Here is what the maze looked like. The trees are to add shadow to the maze, blocking the sky texture node I was using for lighting. I added them on both sides because I wasn't sure which rotation of the sky image would look better, and the sun shadows only fall one way. There are only some lights near the camera to lighten up some of the hedges in the foreground.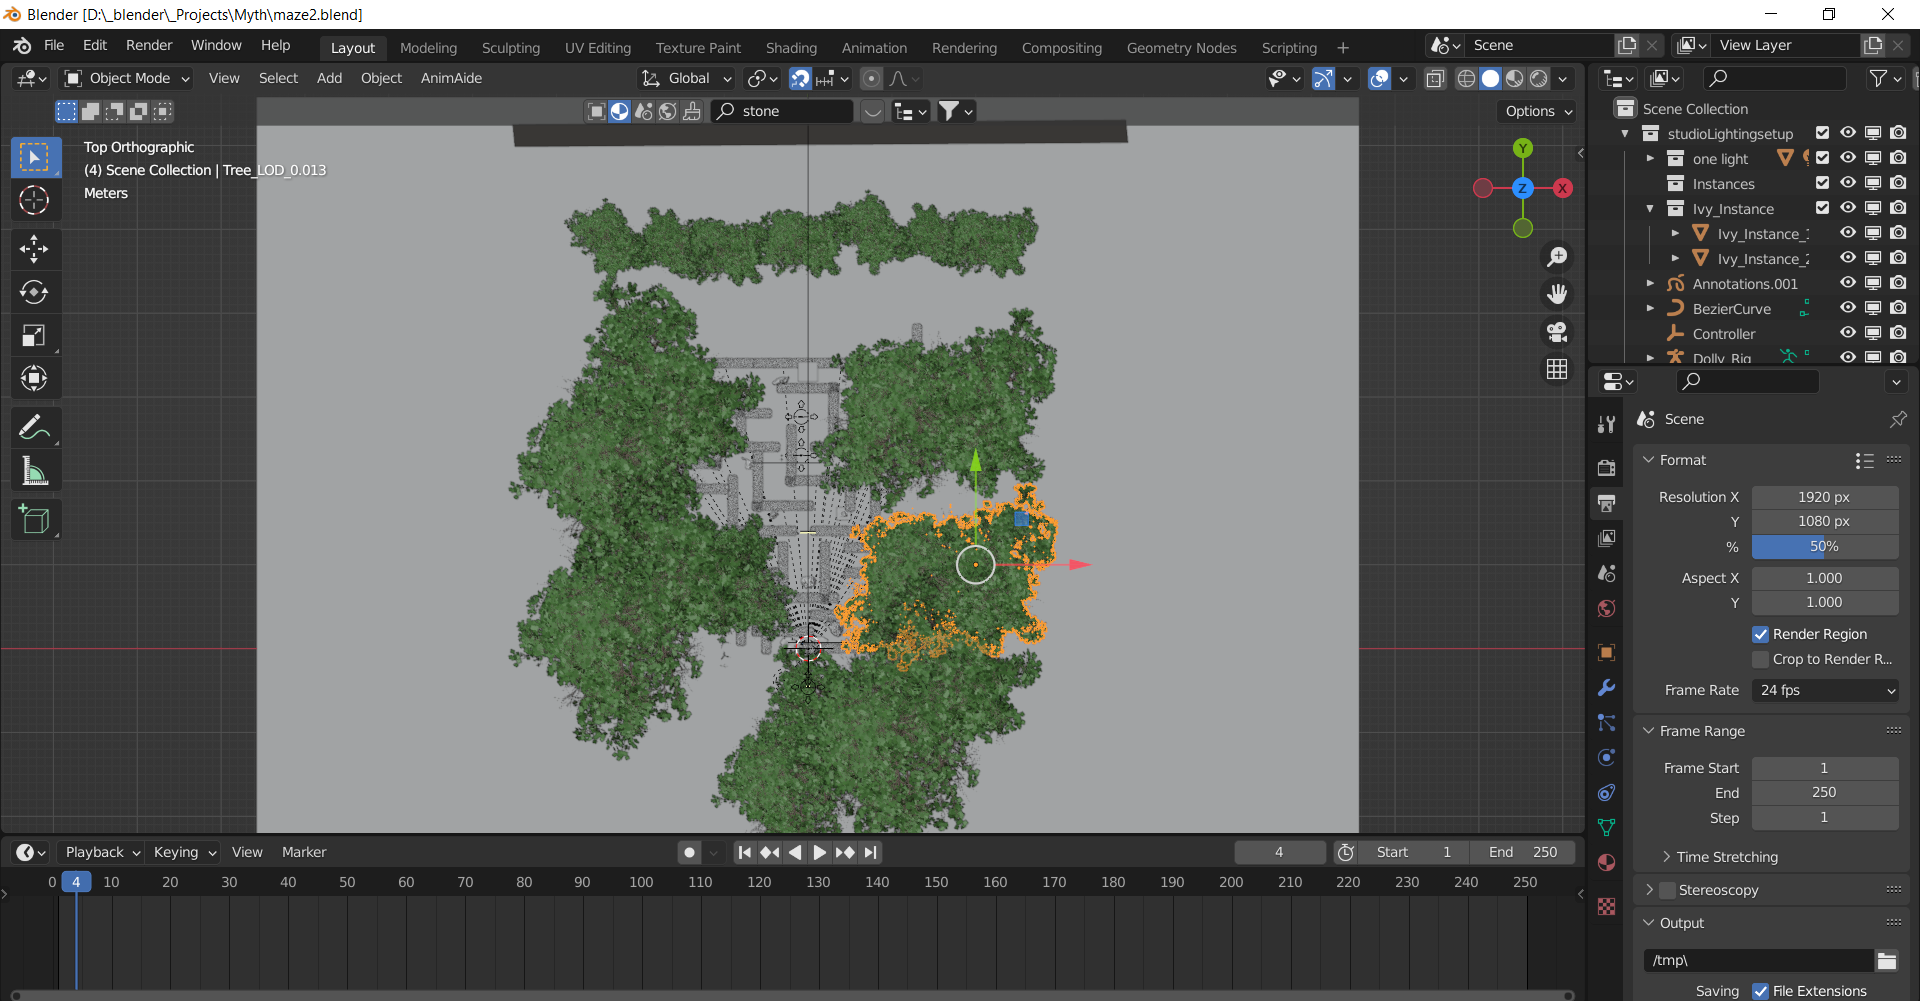
After blocking the scene. I had to make the maze square because the only bush I had was a rectangle. I like the idea of geometry nodes, so one day I'll make a maze hedge with that. Blender 3.0's new viewport rendering speed made making this scene possible in the time left for the contest. 2.9's viewport updates much slower. Setting the noise threshold to 1, allowed me to mostly see that scene, and I only needed to turn that to .01 if I was working on a texture.
Figuring out how to use the sky node lighting, I have a node setup in the world setting with an hdrmi node with a mix shader and a sky node. The below image I just used an image plane in the background.
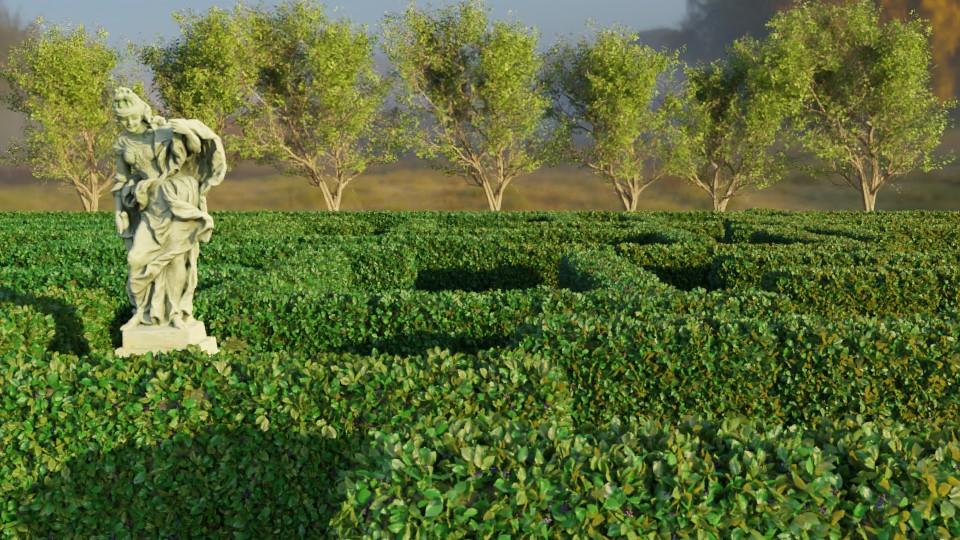
Better lighting with trees as gobos around the perimeter. With an image texture as the background, the trees here look ok, but with the Niski sky the leaves didn't look as full. Also added flowers as a border, and more statues.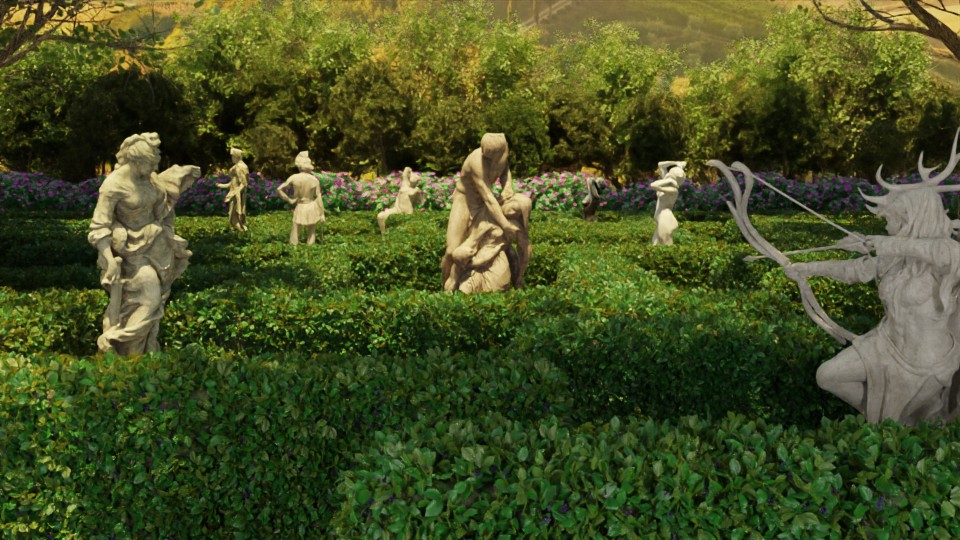
Added framing in the front,and moved the trees just outside the camera to get some better shadows on the maze hedges.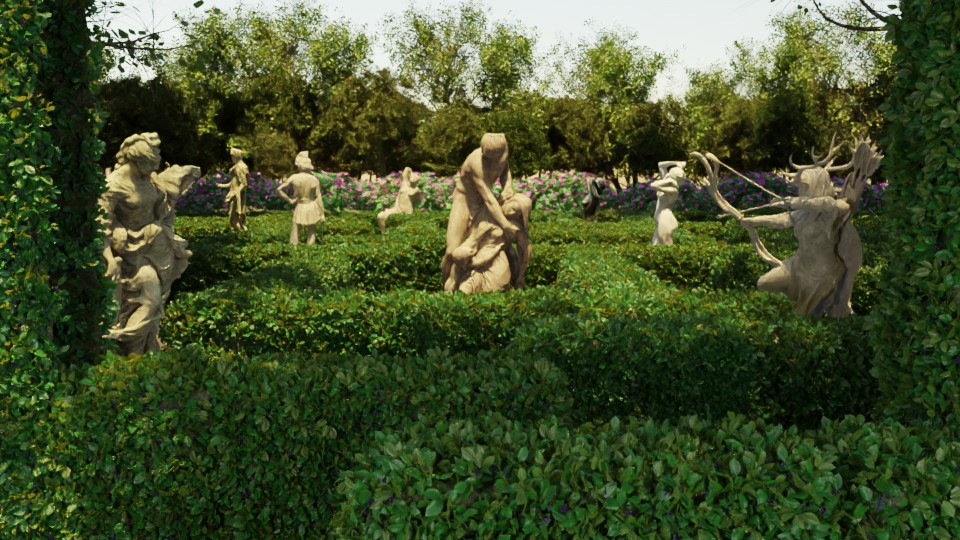
I grabbed a tower from Blend swap as a pace holder. I wanted a tower or some structure like the inspiration image. Tower details like the door are too small.
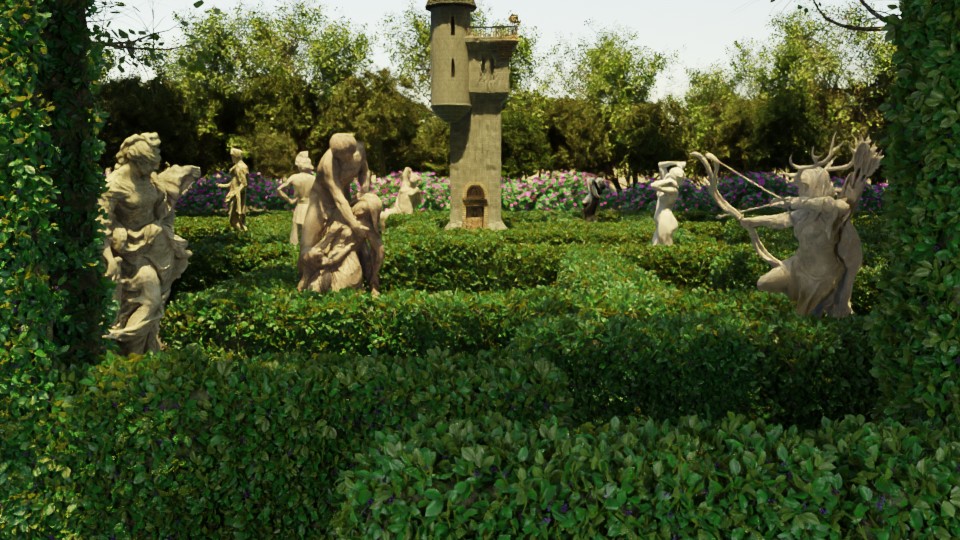
Following the rule of thirds, I placed the tower to the right. Removed the trees where the leaves didn't look so full. Resized the tower to see what that looks like. Then realized that the front stature is blocking the maze entrance.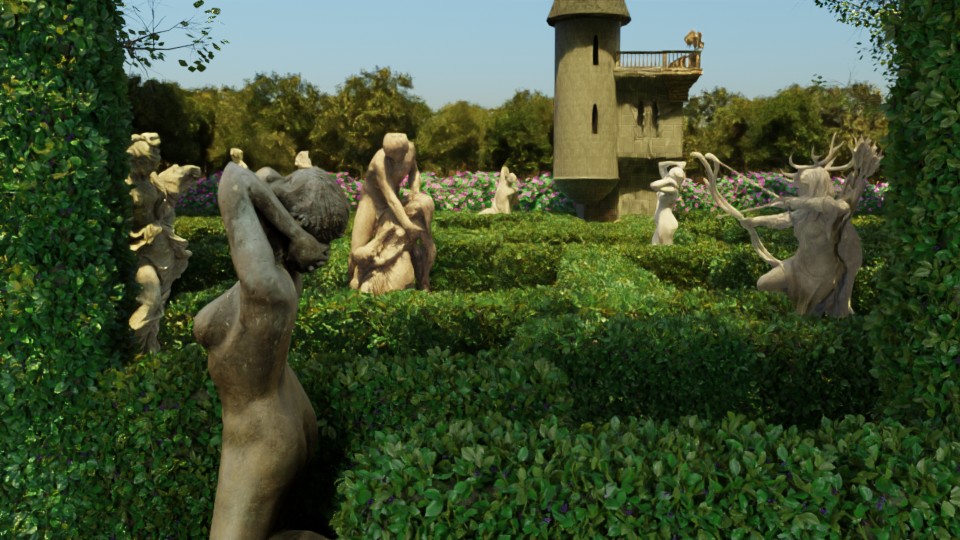
I Grabbed the cone and texture and door from the Blend swap model. I modeled the bricks in the tower by making one brick, and using the curve tool, and the array modifier to make the bricks line up in a circle. You select the brick in the curve modifier, and then use the array below that. Then I copied and pasted the bricks one level above, and rotated them slightly, then again and again. Then I used the same technique for the dentil molding brick. Time didn't allow me to make a very good tower. I didn't want to just make a cylinder with a texture because then I would have to fuss over how to texture the thing. I textured the one brick, and all the bricks were ok. After the challenge I watched this video and planned on redoing the tower. With an arch for windows, and door arch. This video is awesome, in that he shows you how to use the bevel tool correctly. Using an edge loop and then selecting the edge and beveling is a great combo technique. Also using the bevel tool where two areas meet adds a nice transition between the two. The important part is to select an edge and use the bevel tool with the preset. I might have added this type of structure behind the flowers, using an array modifier.
And then I found this tutorial:
He explains how to make a pillar, and then uses the cube project to get a UV, and then gets a stone like texture image map for the object. He uses a separate object to distress the pillar and shows how he makes that object. He then shows how to use the cel fracture plugin to break apart the pillar. One thing I hadn't known was that you can use the annotation feature to draw on the pillar and then use cel fracture to break along those drawn parts. (A great tip) The most important part I found was that he clones a second material and in cel fracture uses that for material for the inside areas that the cel fracture creates when it breaks apart the object. He also uses this when he uses that second object to Boolean the distressed parts also. Just a great workflow with a very nice result.
Resized the tower so the door looked human size in relation to the statues. hmmMm, maybe the cone doesn't need to be there as that would be closer to to the inspiration image.
This is a version I did with a hero I found on sketchfab. It would of been nice to be able to submit this image. Notice the new trees in the background. I also tried to make the ground more life like with a displacement map. I also used some composition nodes to add lens flare, glare, blur, and lens distortion to the image. Looks less cg, especially with the blur.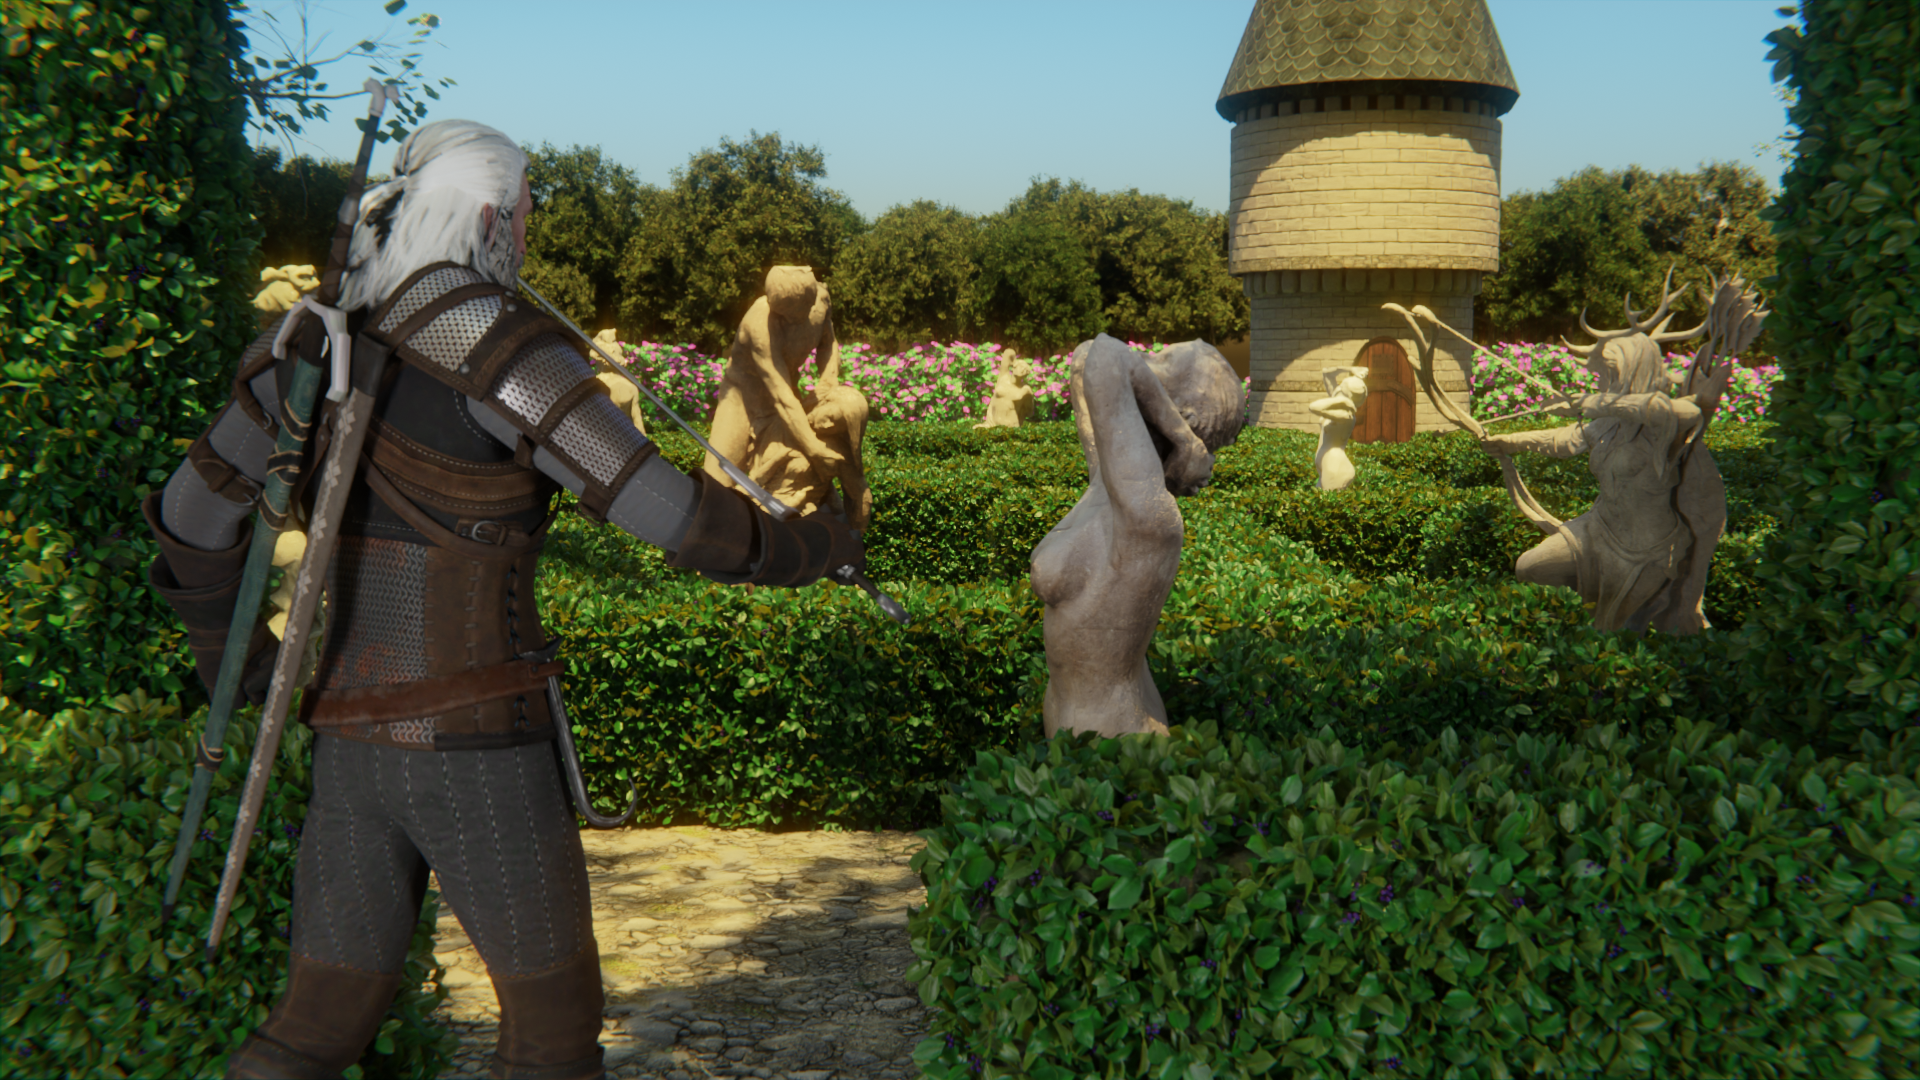
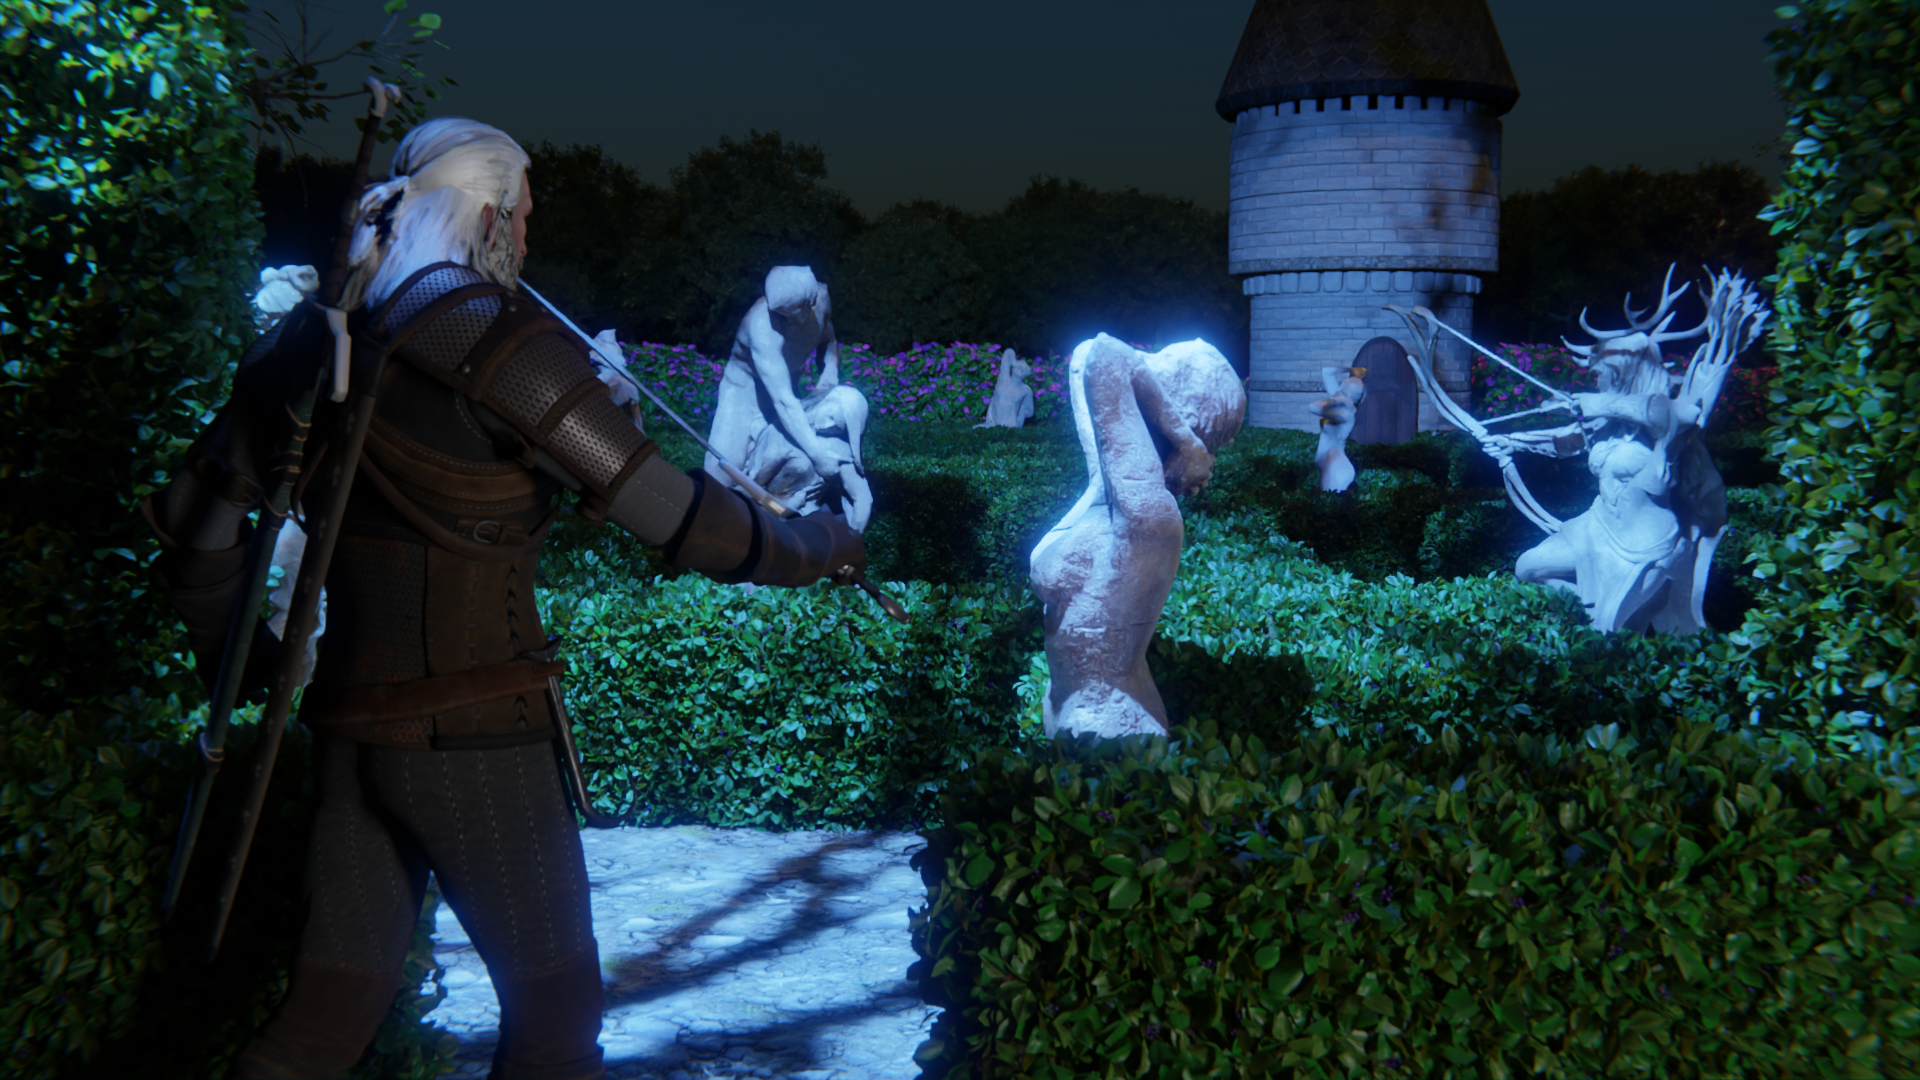
I wanted to see if the scene was more interesting as a night shot with the moon shining.
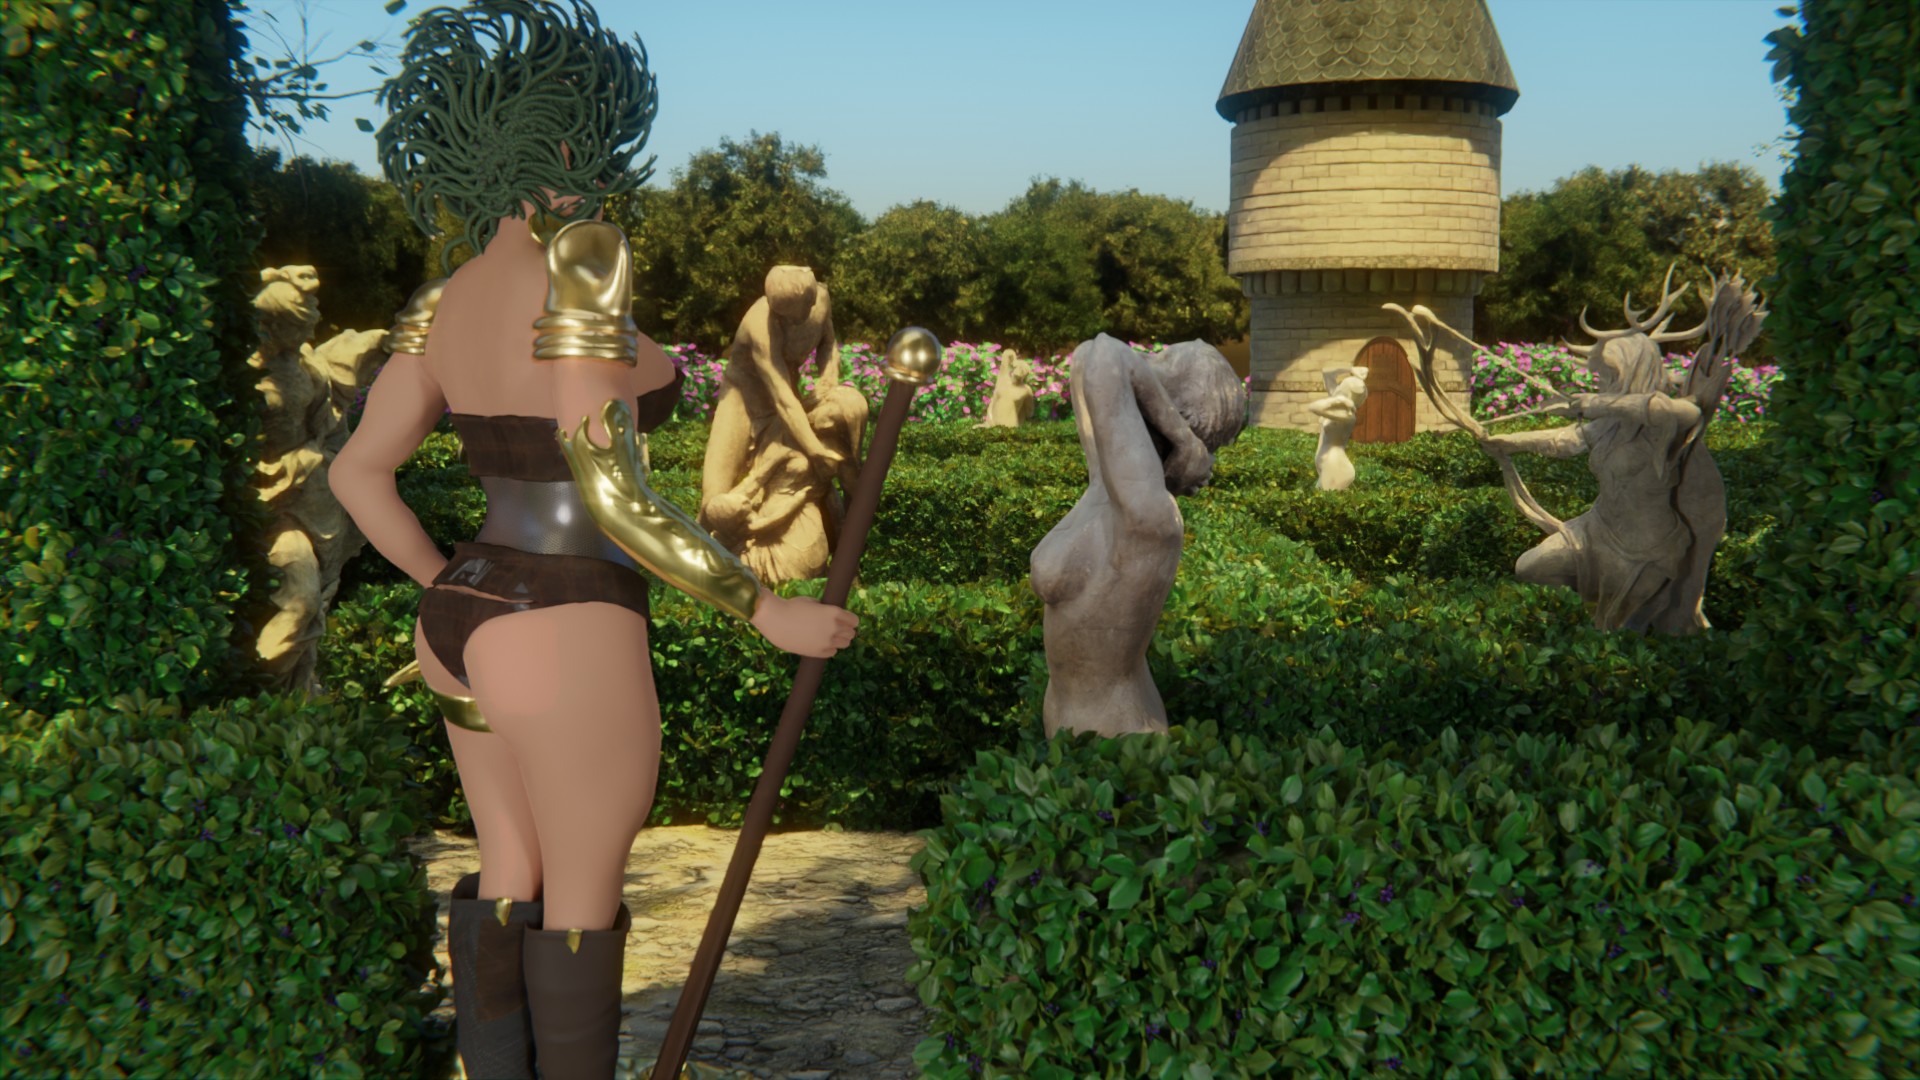
Here is what I wanted to do and I didn't have enough time to complete the shot, but I wanted to make a Medusa. I got a free female Warrior, and a snake object from blend swap, and then tried to use geometry nodes to make a snake hair. The Snake object is on a curve, so I could just make a new curve, and then duplicate that for snake hair. I might still do that. But I wanted to try using geometry nodes. I made a duplicate of just her skull, with out ears, and forehead, just the back and a little of the sides and top. I used this object with geometry nodes, and had the instances of the snake emit from the poly faces.
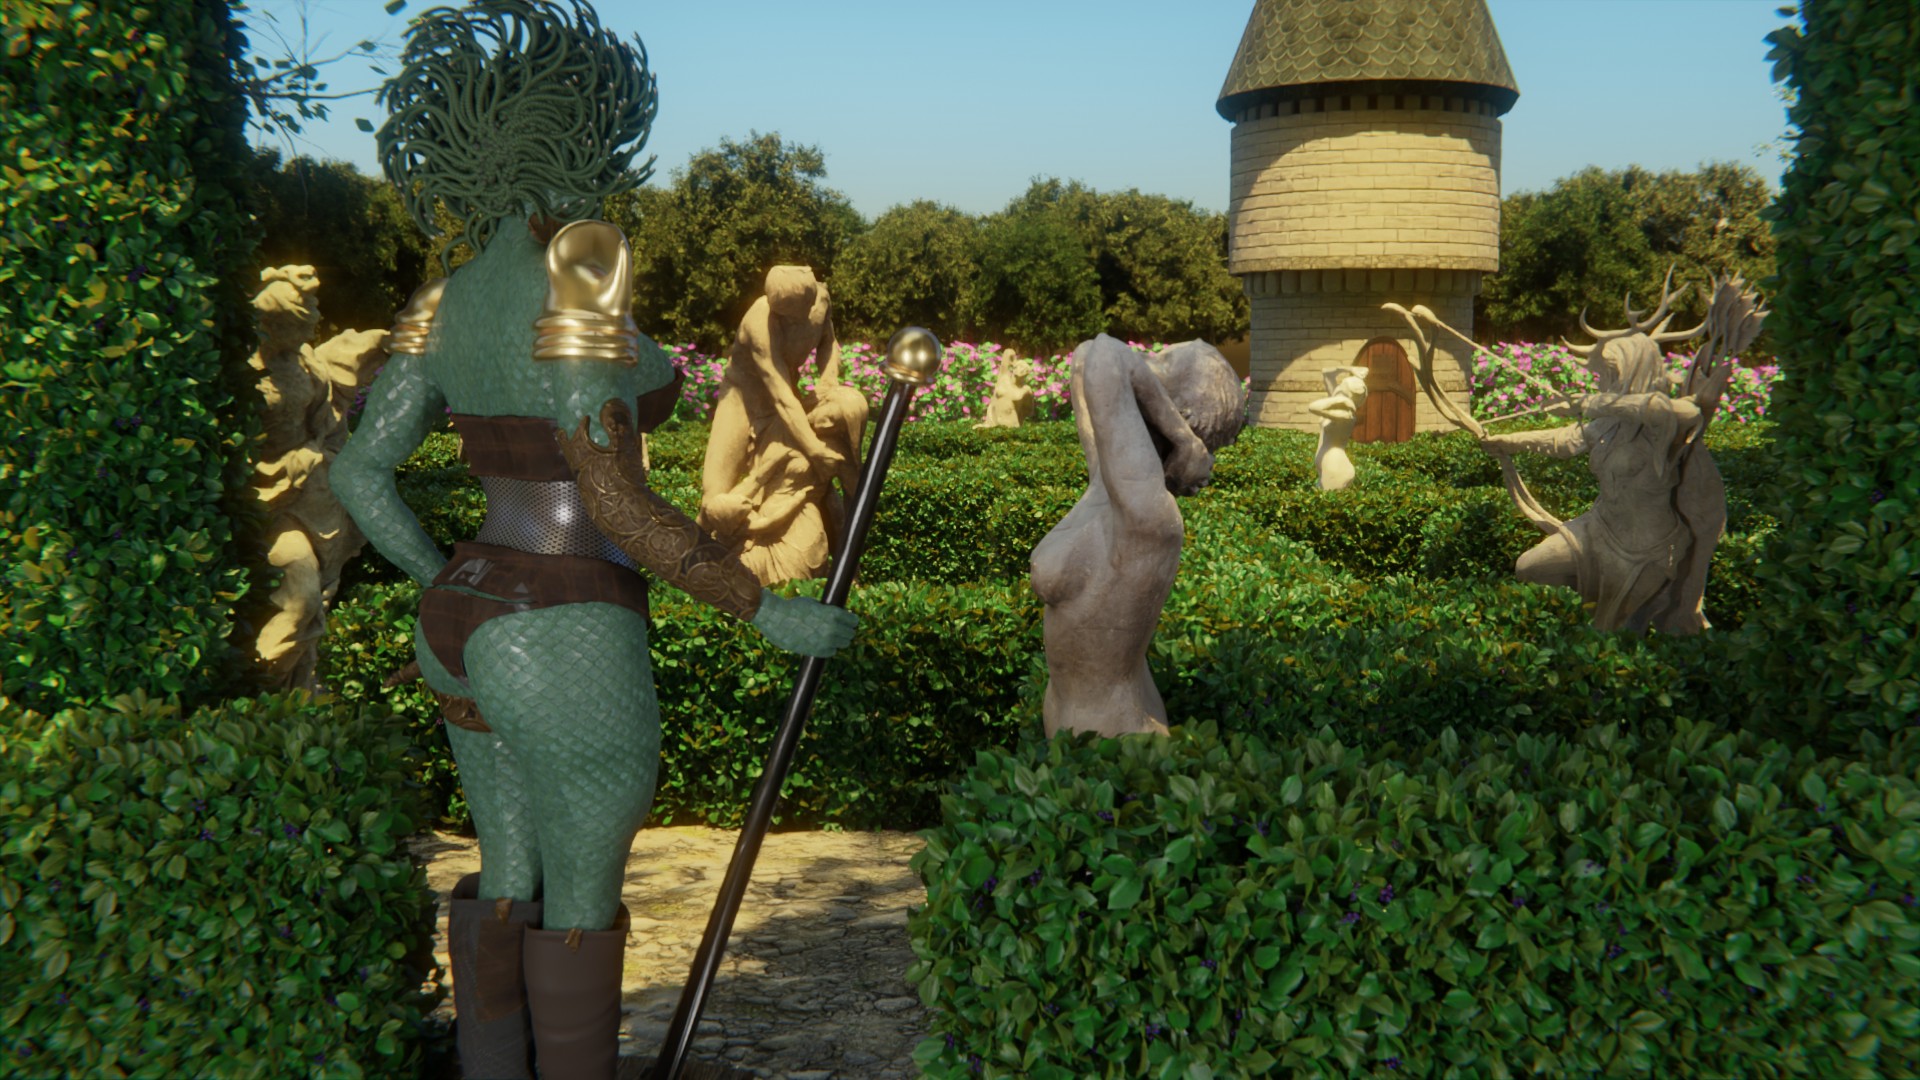
I Changed the skin of Medusa, I'm not sure If I like that, but I thought that's interesting, to see what she looks like as a more snake like character.
If you'd like to see more CG Recipes - Please consider becoming a Pateron, Click on the link below. Thanks for following along with us.

- Log in to post comments